Understanding Navigation Menu
There are multiple ways to Navigate in AntMyERP. Please refer to the screenshots given.
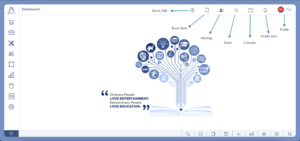
Top Menu
The top menu has the following icons/ buttons respectively.
Quick Add – You can add service tickets/tasks/Purchase Order /Proposal etc.
Favourite – You can Bookmark your Favourite page.
Meeting – Employees can create meetings
Ticket – Employees can check Task/Service ticket/ Open ticket etc.
Calendar – Employees can see the daily calendar with the Job assigned to them.
Notifications – Employees can check notifications.
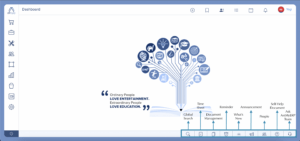
Bottom Menu
The Bottom menu has the following icons/ buttons respectively.
Global Search – Employees can search directly using keywords.
TimeSheet – Employees can directly access their timesheet here.
Document Management – Employees can upload and access the documents.
Reminder – Employees can check the updates on the service tickets.
What’s New – Employees can check the latest updates here.
Announcement – Employees can see the internal announcements here.
People – The record of all the employees as well as the contacts in ERP is available here.
Chat With Your Team – This space is created for the employees to chat internally.
Self Help Documents – The users can create a service ticket for their issue here.
Ask AntMyERP Team – The users can get in touch with the tech team from here.
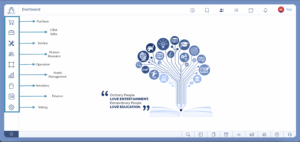
Left Menu
The Left menu has the following Modules respectively.
Purchase – Use for Purchase Management
CRM Sales – Use for CRM Sales Management.
Service – Gives access to the Service module.
Human Resource – Gives access to the Human Resource module.
Operation – Gives access to the Operation module.
Asset Management – Gives access to the Asset Management module.
Inventory – Gives access to the Inventory module.
Finance – Gives access to the Finance module.
Settings – Gives access to the Settings module.
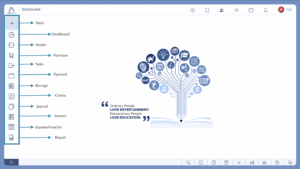
Finance
Finance module has the following sub-modules respectively.
Dashboard – Dashboard has everything related to finance in one place.
Master – The masters show different types of ledgers in one place.
Purchase – Purchase sub-module records all the purchased material and also any material returned after purchased.
Sales – The Sales sub-module records all the sold material and also any material returned after sale by the clients.
Payment – This sub-module is to make and record payments to clients.
Receipt – This sub-module keeps the record of all the payments that have been received and pending payments to be received.
Contra – Contra Entry means transactions that take place when cash is deposited or withdrawn from cash or bank to cash or bank.
Journal – A Journal entry is a record of every transaction that takes place every day in the company.
Invoice – An Invoice is a list of goods and services provided, with a statement of the amount to be paid for the same.
Expense Voucher – An expense voucher is created for a variety of expenses incurred by the employees for executing work for the company.
Report – The reports sub-module contains all the financial reports.
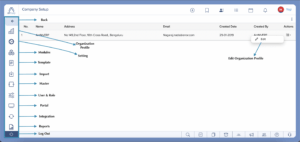
Setting
Back – This button takes you back to the main left menu modules.
Organization Profile – This section contains the basic information of the organisation and individual employees.
Setting
- Security – Through this section, you can change your account’s security preferences.
- Business – This section has all the settings related to MPS or ASP Business
Modules
- Purchase – Through this, you can give permissions for the Purchase module.
- Service – Through this, you can give permissions for the Service module.
- Sales – Through this, you can give permissions for the Sales module.
- HR – Through this, you can give permissions for the HR module.
- Meeting – Through this, you can give permissions for the Meeting.
- Task – Through this, you can give permissions for the Task module.
- Finance – Through this, you can give permissions for the Finance module.
- Operation – Through this, you can give permissions for the Operation module.
- Excel Setting – Through this, you can give permissions for Large Excel Export.
Template – In this section, you can create, edit and manage all your emails, SMS, terms and conditions and annexure.
Import – Here, you can manage all your imports at a glance.
Master – Through this, you can manage all the masters of each module in one place.
User & Role – In this section, you can define and manage all the users in ERP like client, vendor and employee.
Portal – Here, you can manage your client and vendor portal as per your requirement.
Integration – Here, you can integrate your ERP system with third party applications with access tokens.
Reports – In this section you can view and work on user rights, permissions, chat, ratings, security, log reports and restrictions.
Getting Started Overview
Mobile Responsive