Documents Overview

by Mehek
|
2022-07-28
Document Management Application.
How can I provide Document Management permissions to employees in AntMyERP?
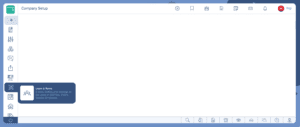
1. Access the left menu by clicking on the “Settings” option.
To enable the user to use Document Management, enable the permissions related by following the below given steps
Navigate to the left menu> Settings> User and Roles.
Select the employee you want to give permissions.
Scroll to the right of the employee’s name and select Edit from the Action dropdown list.
Go to the Permissions tab and enable Manage Document and Manage Document Management options.
Click on Save.
2. How do I search for Users and Roles in AntMyERP?
Within the left menu, navigate to the “Settings” section.
In the left menu of the “Settings” section, you’ll find a search bar. Use this to search for “Users and Roles.”

3. How do I find a specific user or role for a permissions assignment?
In the “Users and Roles” section, use the search bar to find a user by their name or email ID.
4. How do I grant Document Management permissions to a specific user?
Once you’ve found the user you want to grant permissions to, click on the “Action” button associated with that user’s entry.
Select the “Edit” option from the actions menu.
5. How can I configure Document Management permissions for the selected user?
Within the user’s editing interface, navigate to the “Permission” tab.
6. How do I allow “Manage Document Management” permission for the user?
In the “Permission” tab, locate the “Manage Document Management” permission.
Toggle the permission to “Allow” for the selected user.
7. What does granting “Manage Document Management” permission enabled for the user?
Granting this permission will enable the user to access the Document Management features.
The user will be able to view the Document Management icon in the footer of their portal and access the same.
8. How can the user access the Document Management features after permission is granted?
Once the “Manage Document Management” permission is granted, the user can log in to their portal.
They will now see the Document Management icon in the footer of the portal.
9. How can I make sure the permissions are applied correctly?
After granting the necessary permission, ask the user to log in and check if they can see the Document Management icon.
If the icon is visible, the permissions have been successfully applied.
Alternate Method
10. How can I quickly access the User Management section?
Instead of navigating through the left menu, you can use the shortcut “Ctrl + Space” to directly access the User Management section.
How to Rename or Delete a Document in AntMyERP?
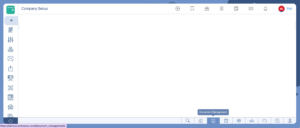
In the portal footer, you will find various icons, including the “Document Management” icon, which is the third icon from the left. Click on this icon to access the document management section. Here, you will be able to view all the documents that have been uploaded.

Viewing Documents in Document Management
Navigate to the bottom menu> Document Management.
The index view appears which shows all the documents that have been uploaded. The user will view three tabs, which are:
Uploaded by Me – All the documents uploaded by the user will be visible under this tab.
Shared With Me – This tab contains all the documents that have been shared with the user.
Deleted – All the deleted documents will be shown under this tab.
Note: The deleted files cannot be restored.
Uploading Documents in Document Management
Navigate to the bottom menu> Document Management.
The index view appears which shows all the documents that have been uploaded.
Click on the plus button in the top bar.
Click on the upward arrow and select the document that has to be uploaded. Enter all the information related to it like doc name, associate, tags etc. in the fields provided.
The user can add multiple documents, by clicking on the Upload New button.
Once done, click on Save.
Note: Under tags the user can add the name of the company with whom the doc is associated with.
The user can add multiple names with whom they want to share the doc with.
The user can edit/ delete (under Action dropdown) the items present only under Uploaded by Me.
Editing Documents
Find the document you wish to edit from the list of uploaded documents.
Click on the “Edit” of Action button next to the document’s details.
A form will appear, allowing you to update the document’s title, tags, notes, associates, and sharing settings.
Make the necessary changes to the document’s details.
Click “Save” to update the document with the new information.
Deleting Documents
Find the document you want to delete from the list of uploaded documents.
Click on the “Delete” Action button next to the document’s details.
A confirmation prompt will appear, asking you to confirm the deletion.
Click “OK” on the sweet alert confirmation to proceed with the deletion.
The document will be moved to the “Deleted” tab, where you can view deleted documents if needed.
Please note that once a document is deleted, it will be moved to the “Deleted” tab, and you can access it from there.
Exercise caution while deleting documents, as deleted documents may not be recoverable.

