Mobile Apps
 |
|
2022-07-28
Understanding Mobile App
AntMyERP has a comprehensive mobile application designed to streamline various administrative tasks and facilitate communication within an organization. Its features include: Attendance Marking, Leave Application, Expense, Voucher Creation, Salary Slip Download and Service Call Management.
Access to different features is controlled through permissions, ensuring that users only have access to the functionalities relevant to their roles and responsibilities.
Permissions for Accessing Mobile App
To Access the mobile app you must have super admin Rights or the necessary permissions.
To initiate the Permissions,
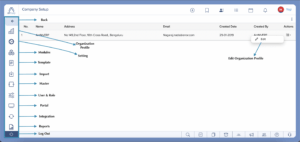
Navigate to left menu > Settings
Click on Users and Roles
Search for the user or group to whom you want to give permission.
Click on Actionicon against the user or group and select Edit
Go to permissions and allow permission for :
Salary ( Display Salary slip and download Salary slip)
Attendance ( Mark your Attendance with Geo Location and Remark)
Team ( See your Team Members and their details)
Expenses Voucher ( Add your Expenses Voucher)
Leave ( Create and View all your Leave and its status)
Service Ticket (Manage your service Tickets )
Download Mobile App
Go to the Play Store (for Android devices) or Apple Store (for iOS devices).
Type AntMyERP in the search box.
Click on the app logo when it appears in the search results.
Click the Download button to install the app on your device.
Login Mobile app
To Login to App, fill in the following fields:
Client Code: Provided by the company, containing the name of the company or a code as the code.
Email Address: Your username or email address associated with the user account.
Password: Provided by the Team for logging into
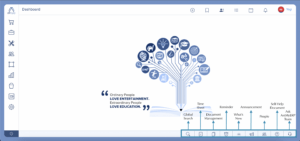
Note: After logging in, the user will be able to see tabs displayed in the app for which they have permissions. Super admin can view all six tabs.
Attendance
Employees can conveniently mark their attendance through the mobile app, simplifying the process for both employees and administrators. It prevents backdated entries for accuracy and accountability. Employees can mark their attendance using the following steps:
To Mark Attendance,
After you login into your mobile app, go to Attendance.
Tap the plus sign located below on the app page.
The app will display the employee’s current location to verify their presence.
Tap Check-In to register attendance. The app automatically timestamps this action, ensuring the date and time cannot be altered.
At the end of the work hours, tap the plus sign again and select Check-Out.
Employees can check in and out multiple times a day, aiding in calculating total work hours. It’s essential to keep the mobile app’s location feature enabled for accurate logging. Check-in/out actions must occur within a 24-hour period.
Leave
This tab serves as a platform to the employees requesting leaves and checking the status of their leave applications. Employees can access this feature both through the ERP platform and the app.
To Apply a leave,
Login to the Mobile app and go to Leave
Click on the plus sign to initiate the leave application process.
Choose the type of leave from the available categories.
Specify the duration of the leave, indicating whether it’s a full or half-day leave. If it’s half-day, whether it’s for the morning or evening.
Select the dates for the leave period.
Optionally, add any remarks or reasons for the leave request.
Click on Apply to submit the leave application.
Once submitted, the status of the leave application will be displayed as pending until it is Approved or Rejected.
Expense Voucher
Users can create expense vouchers on the go. This enables them to track and submit expenses efficiently.
To Create Expense voucher,
Login to the Mobile app and go to Expense.
Upon opening the tab, it displays the categories of raised vouchers and their status – Approved, Rejected, or Pending. Clicking on each category reveals further details. To create an expense voucher:
Click on the plus button below.
Choose between Employee expense or office expense.
Provide details such as the Account head from the dropdown, date, amount, and any remarks regarding the expense.
Select cost center. If you click on Yes, then you need to enter the client’s name and ticket number.
If this expense is billable click on Yes and add the bill amount.
Upload any relevant pictures or documents of the expense.
Click on Save and Next to create another voucher, or Save and Exit if only one voucher needs to be created.
The created voucher will now be visible in the system for further processing.
Salary Slip Download
An employee can download the salary slip of any month whenever necessary by clicking on the month/s that is chosen. This tab helps save time for the employee since the HR/Finance people need not be contacted for this.
To Download Salary Slip,
Login to the Mobile app and go to Salary
Month Wise salary will be displayed. Click on the Download icon and the salary Slip will be downloaded.
Team
Users can view details about their team members and easily contact them, fostering collaboration and communication within the organization.
To View Team,
Login to the Mobile app and go to Team.
All team member details will be displayed. Click on a name to view the contact details.
Service
The app allows The Technicians and Engineers to attend service calls promptly, improving customer service and response times.
For working on a service request,
Login to the Mobile app and go to Service
Click Accepted. The tickets assigned to the employee will appear in the Accepted tab. Click on the ticket corresponding to the employee’s chosen location.
The details of the selected ticket, such as the client’s address, service category, and device details, will be displayed. Clicking on the client’s address will open Maps, providing directions to the client location.
Any messages or special instructions from the ERP ticket will be visible under the ticket in the Special Instructions tab. Information regarding preventive maintenance, knowledge base and machine details logged in the ticket will also be accessible.
Click on Approx Reach Time to enter timing details, enabling the coordinator to estimate the engineer’s arrival time and inform the client if necessary.
Initiate travel to the customer’s location by clicking Start. This action changes the ticket status from Accepted to Working.
In the Working tab, the Reach button becomes active. Confirm or not confirm the machine’s serial number displayed. If not confirmed, the ticket will be removed from the employee’s mobile app and assigned back to the coordinator or ticket creator.
In the Working tab, update the problem description if it differs from the original.
Adjust the priority if needed after assessing the work.
Record observations under the appropriate comment type.
The travel time (TT) will be calculated based on the start and reach times, reflected in the ticket details on the Portal
If the customer is not present or if the issue cannot be resolved immediately, click Stop Timer to prevent SLA breach and fill the required fields and save.
If the problem is solved, click Resolved.
Indicate whether spare parts were used or not. Select Yes or No accordingly.
Add remarks and upload a report of the completed service, including pictures if necessary.
If required, obtain the client’s signature by following the prompts.
The updated ticket will be sent to the coordinator for further action. The engineer’s updates will be visible on the ticket portal.
All changes made to the ticket will be documented under the comments tab in the portal, including uploaded reports and the client’s signature.
The job time (JT) and total time taken for the call recorded in the app will be displayed on the screen’s top right corner.
If the problem is not solved, click on Not Resolved.
Choose the appropriate option:
Self – Click on submit, Add remarks, upload a report if required, take the client’s signature and save.
Client – Select the option from the dropdown. Add Followup date and time Add remarks,upload a Report, if required take the client’s signature and save.
Part Request – Select the part required.
If The issue is Under Observation, click on Under Observation.
Add remarks and upload a report. If required, take the client’s signature and save.
Knowledge Based
Service Checklist and To-Do